Cross Account Provisioning in AWS
Torque supports multiple options for provisioning resources across multiple AWS accounts.
Here are two common approaches
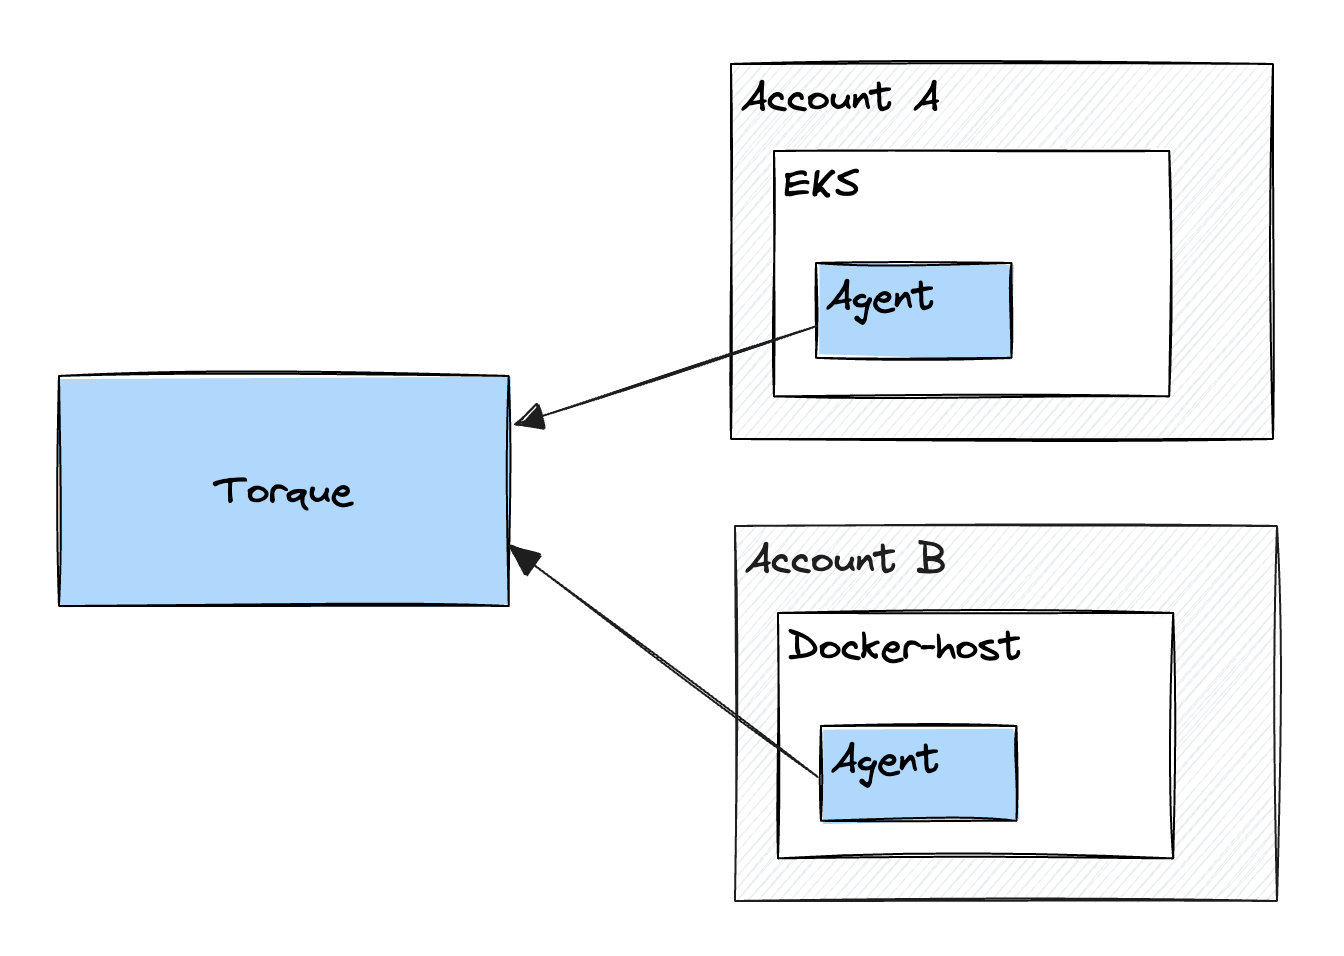
Option A: Torque Agent in each account
Requirements and Setup
- Each Torque Agent is sitting in a different AWS account.
- Each Agent is deployed in a different EKS cluster.
- OIDC is enabled on the clusters, and they each have a valid default service account with an IAM role annotation.
Benefits and Usage
- Changing the agent on a grain (via an agent type Blueprint input with/without allowed values restriction) will change the AWS account that the grain contents will be deployed on.
- Agent name can also be an Account/Space parameter, which will allow switching target accounts on all blueprints/grains that reference it at once.
Architectural Diagram
Option A Diagram: Cross Accounts provisioning with Torque Agent in each account
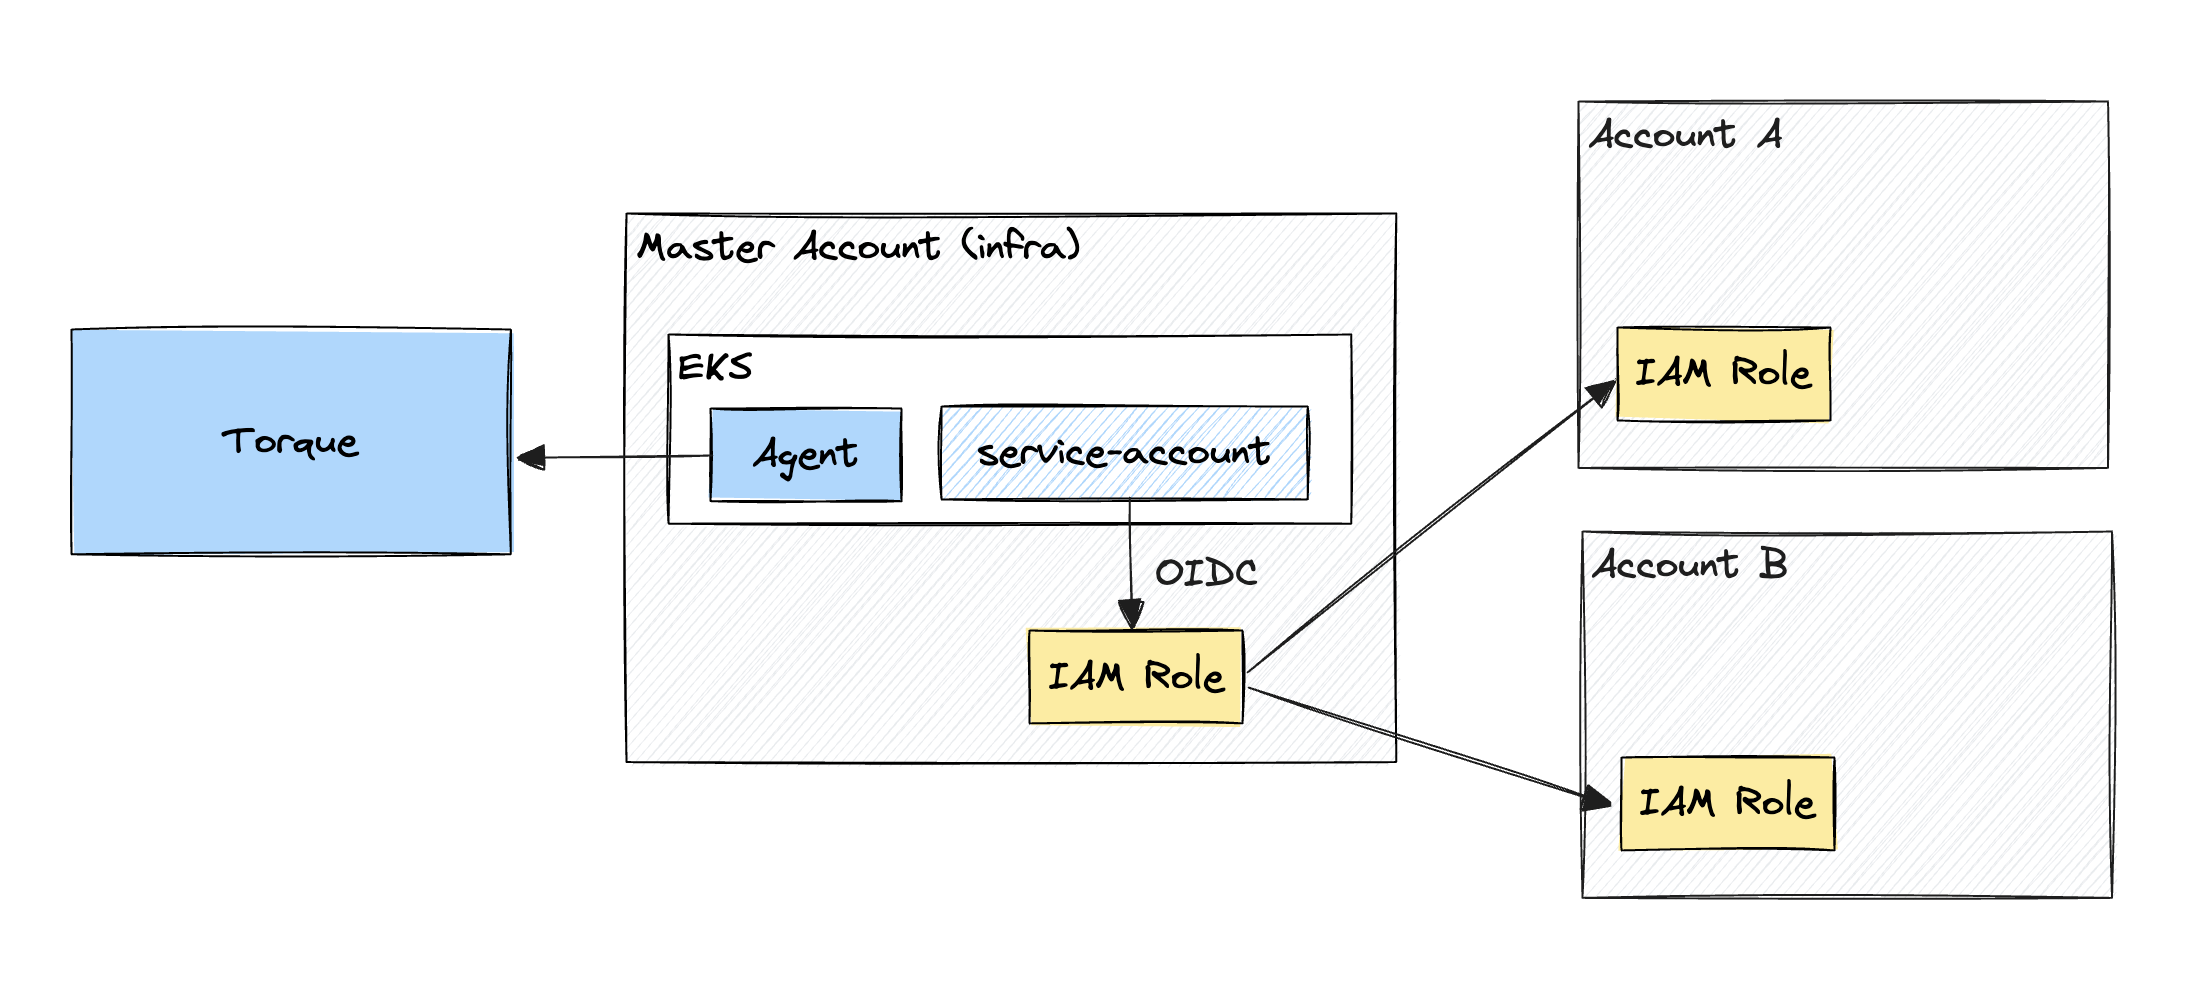
Option B: Single Torque Agent in the Master Account
Requirements and Setup
- Torque agent is configured with a valid default service account that authenticates into an IAM role via OIDC (known as Master account role).
- Each target AWS account has an IAM role with an identical name, with a trust policy set up to allow the Master account role to assume it (known as Target account role).
- These Target Account roles have the permissions necessary to perform the actions Terraform will describe on the respective account.
- By utilizing identical names, the only difference in the IAM role ARNs is the account number.
Role Trust Policy Example
This trust policy is set on the Target account role and references the ARN of the Master account role.
{
  "Version": "2012-10-17",
  "Statement": [ {
      "Effect": "Allow",
      "Principal": {
        "AWS": "arn:aws:iam::111111111111:role/My_AWS_ROLE"
      },
      "Action": "sts:AssumeRole"
  } ]
}
Terraform HCL Example
variable "aws_account_id" {}

provider "aws" {
  assume_role {
    role_arn     = "arn:aws:iam::${var.aws_account_id}:role/ROLE_NAME"
    session_name = "SESSION_NAME"
    external_id  = "EXTERNAL_ID"
  }
}
Torque Blueprint Example
The Blueprint provides the user with a list of accounts to choose from, with a friendly text name for each account which is split out before passing the account number to Terraform.
inputs:
  AWS Account:
    description: "The AWS Account to use"
    default: "Dev | 123456789"
    allowed-values:
      - "Dev | 123456789"
      - "Test | 234567890"
      - "Stage | 345678901"
      - "Prod | 456789012"

grains:
  My AWS Grain:
    kind: terraform
    spec:
      source:
        store: my-repo
        path: somefolder/somesubfolder
      agent:
        name: my-agent
      inputs:
      - aws_account_id: '{{ .inputs.["AWS Account"] | split: "|" | last | strip }}'
      outputs:
      - some_output
Benefits and Usage
- With this structure, multiple AWS accounts are supported without requiring multiple EKS clusters or agents.
- Changing the account is as simple as changing the blueprint input value.
- If accounts are pre-set but need to be swappable, an account/space parameter can be used instead of a blueprint input (and this allows multiple spaces to share the same blueprint but target different accounts).
Architectural Diagram
*Option B Diagram: Cross Accounts provisioning with a Single Torque Agent in the Master Account
Summary
Both options provide flexibility in provisioning resources across multiple AWS accounts based on your specific requirements and setup.
Option A is suitable when you have separate EKS clusters for each account, while Option B allows you to manage multiple accounts from a single Torque agent in the master account.